28And we know that in all things God works for the good of those who love him, who have been called according to his purpose. 29For those God foreknew he also predestined to be conformed to the likeness of his Son, that he might be the firstborn among many brothers. 30And those he predestined, he also called; those he called, he also justified; those he justified, he also glorified.
31What, then, shall we say in response to this? If God is for us, who can be against us?
Romans 8:28-31
Monday, August 9, 2010
Saturday, August 7, 2010
Wednesday, August 4, 2010
Making lemonade!!!
I have some cutie pics for you! I have some updated pics of the baby creations that I made for my BFF’s little girl. They are just too cute and I wanted to share them!!
First of all I made her a little bow-board from this….please excuse the blurry shwecka photo…it’s all I could find of this project!!
And this is how it looks in her little room filled with bows!
Photo by Mari Annelise
Here are some of her other goodies I made her…remember the “M” frame…the shower invitation frame…the little jars decorated with ribbon that held mints…all from her babyshower??? Isn’t it too cute how Lorie incorporated them into the decoration?? Love it!!
Photo by Mari Annelise
And look at this darlin’ one with the tissue balls I made to decorate her porch when they brought Miss Mya home! And there’s the door mum decoration too!
Photo by Mari Annelise
Here are a few extra pics of these cuties!! Arent’ they just precious???
Photo by Mari Annelise
These photos are all taken by a local photographer: Mari Annelise. Aren’t they just gorg! She does an amazing job. Check out her work here!!!
Hope your August has gotten off to a wonderful start. Fall will be here before we know it!! I’m so ready to start spray painting some pumpkins!!! Whoop-whoop!
XoXo
Thursday, July 22, 2010
Homemade finger paints…
Maybe it’s because I used to teach high school art…or perhaps it’s because I love a brand new box of crayons…or any new art supply for that matter. Art supplies make my {heart} happy.
I tried a recipe I found recently for making homemade finger paints for Jaxon…because…you know…I’d prefer him not eat paint made with funky chemicals. And let’s be honest…he’s 15 months old and he’s going to taste-test it. I just know it. I loved how these turned out and I had to share.
Aren’t they so pretty!!! Yaaaay! I’m totally in love with them!
I used left-over baby food jars for containers…you know the ones you hang on to because you swear they are good for something!. Lol.
**Please note: This recipe has been featured in many places and I've had TONS of questions about the texture outcome. If you add too much cornstarch you will get gloppy paint. Just reduce cornstarch or thin with water for a smoother texture.
Also - I NEVER said these were meant to be literally EATEN by kiddos. When we made these - Jaxon was at the stage where he was putting everything in his mouth and I didn't want him to accidentally eat some crazy store-bought paints. For me at least these were safer and homemade. Please do not re-post the recipe as EDIBLE paints for kids to eat as they are not snacks or food for kiddos! Thank you bunches!!
Here’s the recipe:
XoXo
Don't forget to swing by and read THIS POST and leave me a comment to win a $50 Visa gift courtesy of BlogHer! Great for the upcoming CHRISTMAS holidays!!
I tried a recipe I found recently for making homemade finger paints for Jaxon…because…you know…I’d prefer him not eat paint made with funky chemicals. And let’s be honest…he’s 15 months old and he’s going to taste-test it. I just know it. I loved how these turned out and I had to share.
Aren’t they so pretty!!! Yaaaay! I’m totally in love with them!
I used left-over baby food jars for containers…you know the ones you hang on to because you swear they are good for something!. Lol.
**Please note: This recipe has been featured in many places and I've had TONS of questions about the texture outcome. If you add too much cornstarch you will get gloppy paint. Just reduce cornstarch or thin with water for a smoother texture.
Also - I NEVER said these were meant to be literally EATEN by kiddos. When we made these - Jaxon was at the stage where he was putting everything in his mouth and I didn't want him to accidentally eat some crazy store-bought paints. For me at least these were safer and homemade. Please do not re-post the recipe as EDIBLE paints for kids to eat as they are not snacks or food for kiddos! Thank you bunches!!
Here’s the recipe:
XoXo
Don't forget to swing by and read THIS POST and leave me a comment to win a $50 Visa gift courtesy of BlogHer! Great for the upcoming CHRISTMAS holidays!!
Sunday, July 18, 2010
Amazon backyards-summertime fun & white paint love
We have been up to our ears in fun, activities, projects and grass!! Thanks to all of the wonderful rain our front and backyards look amazing. Considering when we first moved in we had dirt with a few weeds…our backyard has done a complete 360 in the past couple of years (thank goodness).
It’s finally pretty and a place where we enjoy spending our mornings and evenings. Jax especially loves his backyard play-time. He also loves to help work on things such as hammering wood and even….helping his Dad mow. He thinks he’s really BIG.
He loves to mow…almost as much as he loves those boots. Which I might add are a tad too big…but he could care less. He loves to hear them click on the floor and when he goes outside…he thinks he must have them on. It’s really quite funny and precious.
When this little boy works…he gives 110%. He’s very serious. And it’s very cute. He doesn’t even stop to smile.
Can’t you just see how hard this little boy has been working.
He is 100% all boy.
And his Mamma loves him {and his boots} oh so very much!!!
He was very excited when our neighbor popped in for a visit too!
I just think these pics are too cute.
So anywho…we’ve been working on lot’s of goodies around here in Easie Peasie land. I can’t wait to get everything posted. But in between summertime fun…I get distracted and behind!!
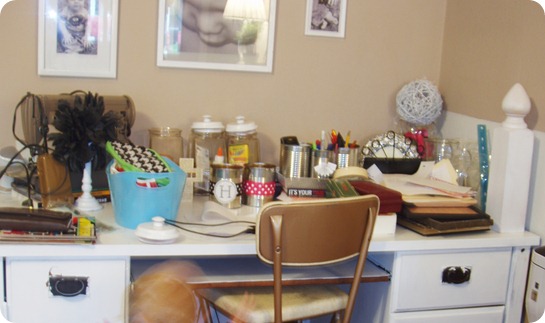
I did paint my pretty little French desk…which looked like this…
….and it now looks like this!
I can’t wait to reveal what I’ve done with this pile-of-lovin’-junk-mess!!!
XoXo
It’s finally pretty and a place where we enjoy spending our mornings and evenings. Jax especially loves his backyard play-time. He also loves to help work on things such as hammering wood and even….helping his Dad mow. He thinks he’s really BIG.
He loves to mow…almost as much as he loves those boots. Which I might add are a tad too big…but he could care less. He loves to hear them click on the floor and when he goes outside…he thinks he must have them on. It’s really quite funny and precious.
When this little boy works…he gives 110%. He’s very serious. And it’s very cute. He doesn’t even stop to smile.
Can’t you just see how hard this little boy has been working.
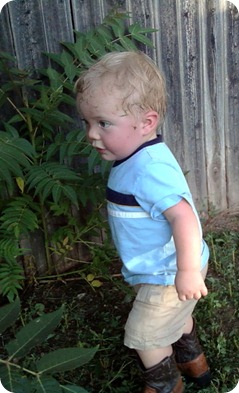
He is 100% all boy.
And his Mamma loves him {and his boots} oh so very much!!!
He was very excited when our neighbor popped in for a visit too!
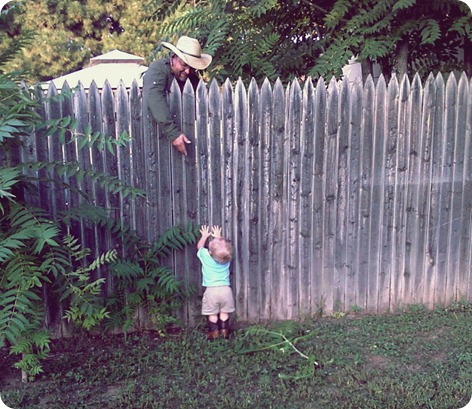
I just think these pics are too cute.
So anywho…we’ve been working on lot’s of goodies around here in Easie Peasie land. I can’t wait to get everything posted. But in between summertime fun…I get distracted and behind!!
I did paint my pretty little French desk…which looked like this…
….and it now looks like this!
I can’t wait to reveal what I’ve done with this pile-of-lovin’-junk-mess!!!
XoXo
Labels:
Before and After
Saturday, July 10, 2010
Baby Shower Crafts…
I’ve been meaning to post a few more pics detailing the crafts I made for my BFF’s baby shower. Two months later and I finally sat down and just cranked it out! So without further ado…here they are!
The corsage:
A different type of corsage…no {real} flowers…and loops of ribbon scraps from the diaper cake and other shower decorations.
Sweet little corsages for her Mom and Mee-Maw….
I knew that Lorie wanted a decorated portable wipey-thing-a-ma-bob so I again utilized the left over ribbon from the diaper cake and projects…hot-glued them in layers on the lid of the holder. I used a flower from my craft-pile…and believe it or not a flower jewel that came off of one of my shoes. I saved it because I knew it would be pretty on something someday! I hot-glued them together and viola!
Lorie’s shower was my first-ever party to decorate. I was soooo nervous! I had never made a diaper cake…much less anything else baby-shower related…but I dove in and started looking at my blog sistas creations. And thank goodness! I found a ton of ideas and started crafting!
I made personalized glass canisters for cookies and mints with canisters I had…and a few from the Dollar Tree. I decorated each one simply by gluing a few strips of ribbon and a few handmade flowers on. {Sorry some of these pics are blurry…I took them in a hurry…and didn’t realize some were blurry…oh the seven seas…I should pay attention some times}
After the shower, Lorie used the smaller bowls for Q-tips and other necessities in Mya’s room. Great idea! You can also take the ribbon off of the glass easily to re-use again without evidence that it had been decorated.
I used the shower invitation as another decoration focal point by the sign-in book.
The frame is a Dollar Tree frame that I jazzed up with a few handmade flowers. I also added a strip of ribbon and a background of scrap-book paper to prettify the invitation.
I also made an “M” initial frame for the cake table. I thought that Lorie could use it later as a decoration in Mya’s room.
I printed a letter “M” and layered it with some scrap-book paper and ribbon. I also made a few paper flowers to jazz up the frame. She really loved it!
My first ever diaper cake wasn’t too shabby which was such a relief. I didn’t have rubber bands which would have helped TREMENDOUSLY…but I made it anyways.
I made oven-curly-ribbons to decorate the top. I thought Lorie could take them off and make little clippy bows later for Miss Mya.
All of the ribbon can be re-used for girly stuff like bows and decor.
This is how the cake table looked as a whole.
It was really fun and I’ve re-used these decoration ideas for other things and for other decorating venues. They are super cute!!
I'm linking these to Mrs. Jamielyn's Sundae Scoop Weekend Link Party!
** I've had quite a few inquiries about how to make the paper flowers on the "M" frame. If you visit this cute blog {DOZI} you can find a perfect tutorial! Just a warning...these are so easy and stinkin' cute you will want to make them and put them on everything!
XoXo
Labels:
Baby Shower Projects,
DIY